CAKE BAKING ROBOT
Description
As the final project in my Robotics course, the entire class embarked on a team challenge: to build a robot that could bake a cake & frost an image onto it. Our goals were to:
Mix the batter
Load the cake into the oven
Load the baked cake onto a machine that could frost it
Frost an image onto the cake
My Role
As a systems engineer on the Load/Unload team:
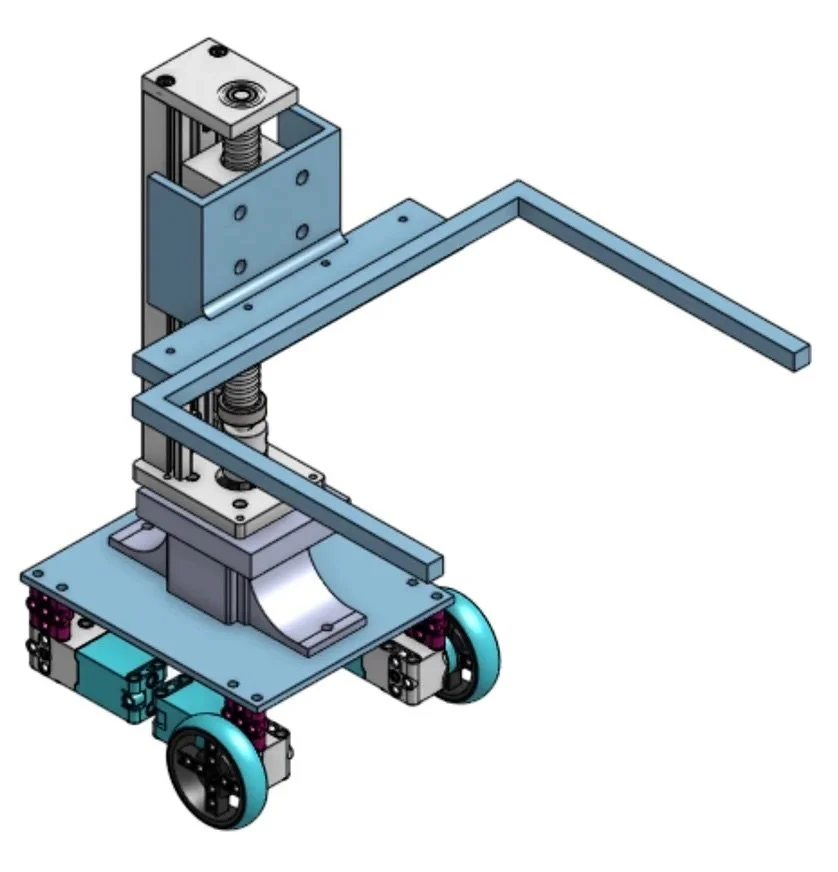
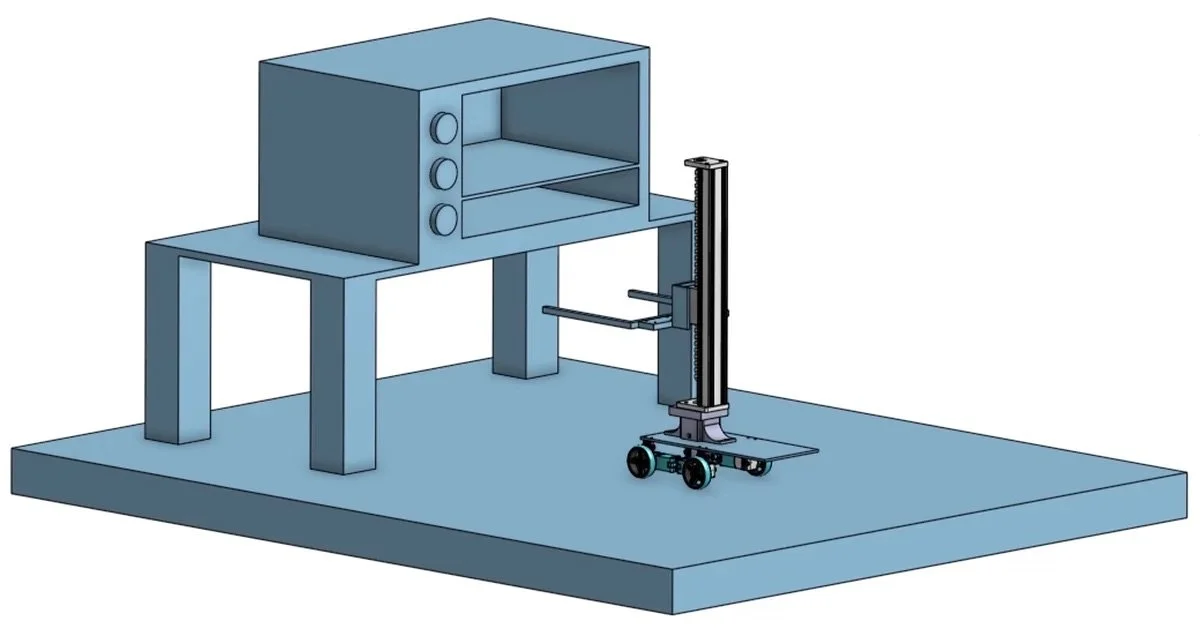
Created a to-scale CAD model of the load/unload robot and oven
Collaborated with other teams to clearly determine the overall system design & clearly define requirements for each individual system
Arranged a final run-through with all of teams before demo day
Overview of Solution
Everyone in the class (of 20) split into one of five teams: Oven Control, Mixing, Load/Unload, Frosting Image, Frosting Mechanism. I joined the Load/Unload team (of 4) as a Systems Engineer. This meant that I was in charge of creating a CAD model of our design, collaborating with other teams to clearly define requirements for each individual system, documenting the project, and arranging a final run-through with all of teams before demo day.
The load/unload system efficiently loads the cake into the oven once it is pre-heated, unloads it when fully cooked, and brings the cake to be frosted.
System Design
My team was responsible for designing a system that could get the cake pan from the mixing team, into & out of the oven, and into the position to be frosted. My team’s goal was to limit the degrees of freedom to reduce opportunities for failure. Thus we decided that designing a driving system locked onto a track with a vertical linear actuator would be the best option.
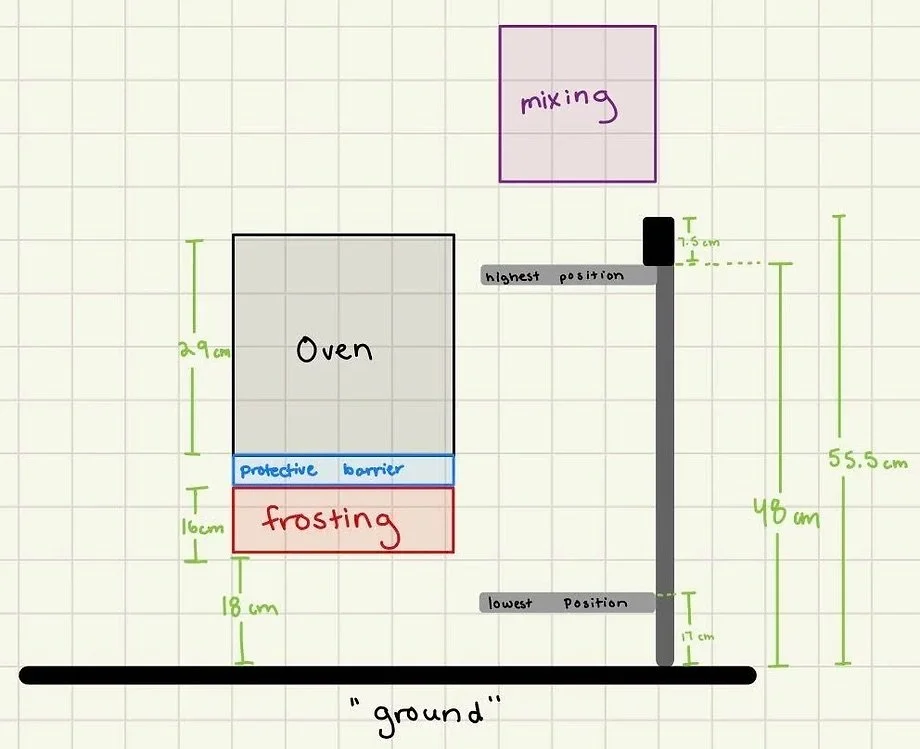
Working with other teams, I came up with an “elevator approach” to the system, in which we stacked the oven and frosting mechanisms – with batter being poured from the top, oven in the middle, and frosting on the bottom.
The system would run autonomously on a Raspberry Pi and communicate with other groups through an AirTable API.

Final Design
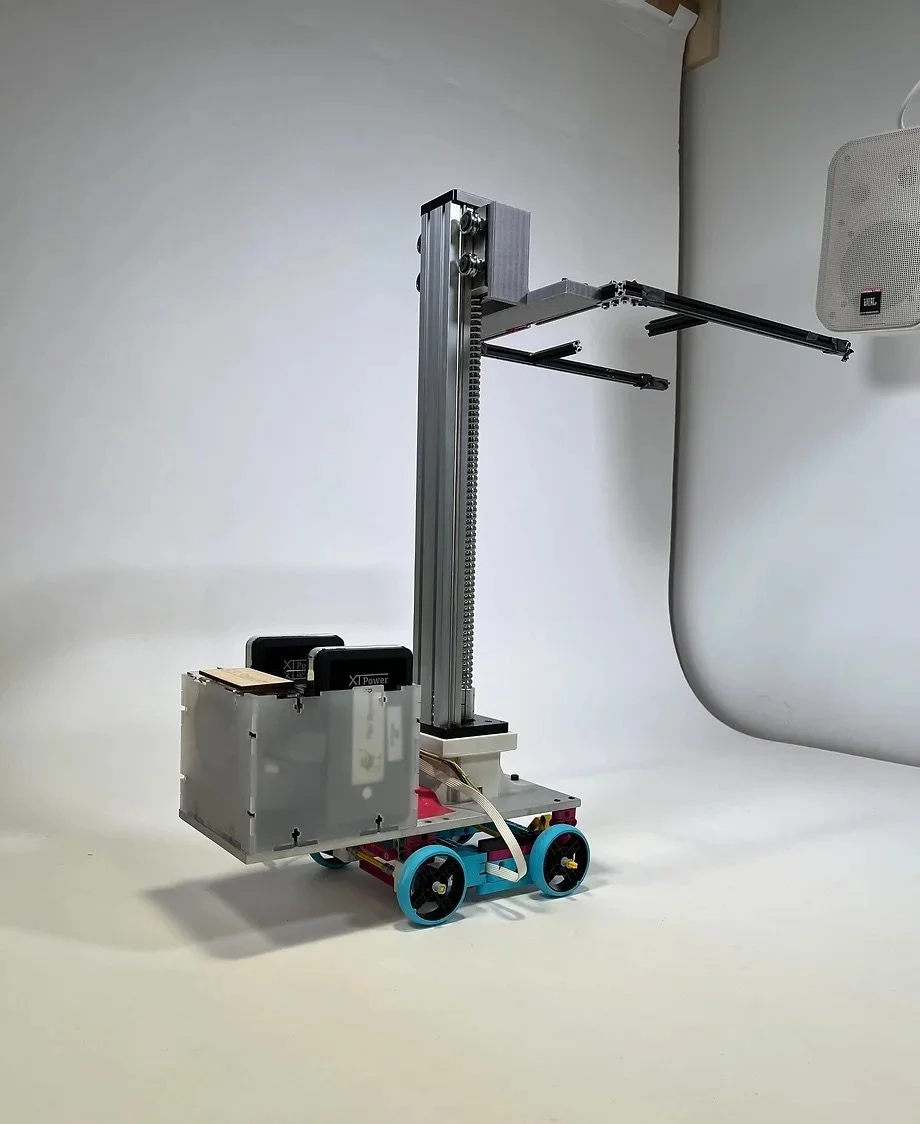
After iterating on the MVP, the final load/unload robot utilized:
300mm linear actuator
MakerBeam “arms”
Longer, waterjet aluminum base plate
Sturdy drive base for the mechanism
More space to hold electronics
Acted as a counterweight to the rest of the front-heavy robot
First Prototype - MVP
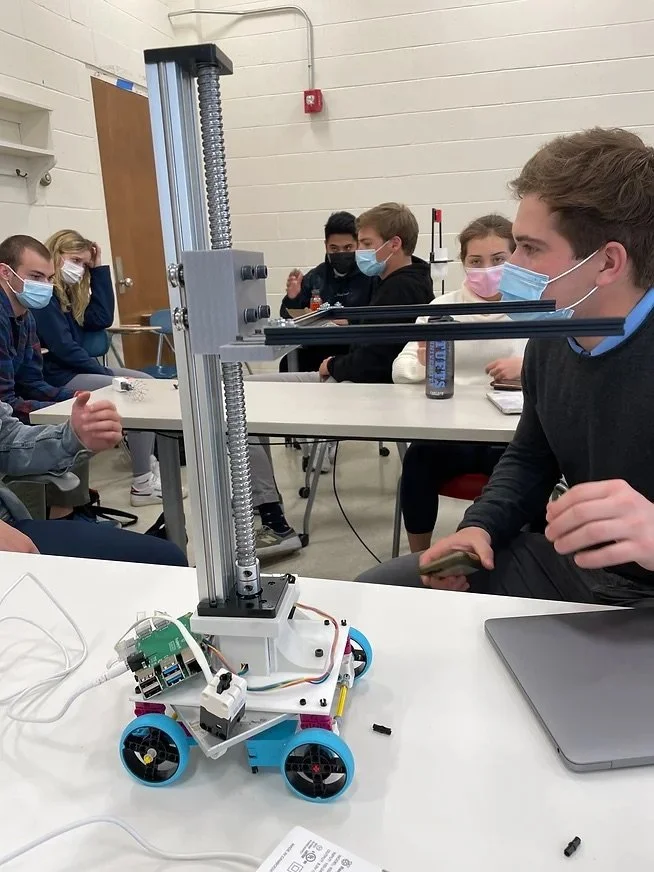
The MVP of the load/unload robot was two degrees of freedom for moving the pan forward/backward in the x-direction and up/down in the z-direction.
The base of the robot is similar to a toy car, using LEGO motors & wheels, and interfacing with laser cut acrylic. Using a Raspberry Pi BuildHat, I wrote a script to drive the car using motor pairs.
The linear actuator allows the robot to move up & down, to which we attached MakerBeam “arms” that would lift the edges of the cake pan. Each of these components are assembled together via custom 3D printed brackets.
